Customer Accounts & Groups
Customer accounts
There are important security considerations involved in user account management. If this is your first Drupal site, see the Managing User Accounts documentation, in the Drupal 8 User Guide, for a good introduction. This documentation page will focus only on aspects of user accounts that are specific to Drupal Commerce. Within Drupal Commerce, we refer to users and user accounts as customers and customer accounts even though they are actually the same entities. A customer is simply a user who has placed an order on your site.
Customizing customer accounts
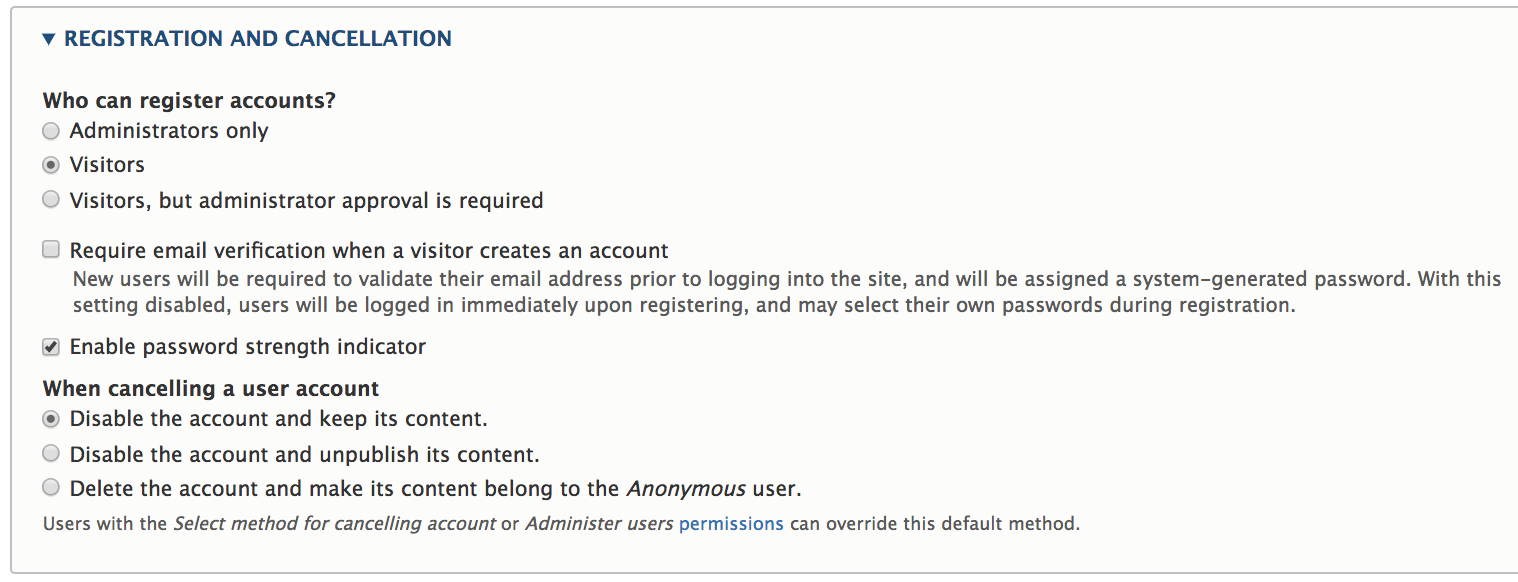
The Registration and Cancellation settings for your customer accounts are located at /admin/config/people/accounts. To reduce cart abandonment, you will typically want to allow Visitors to register accounts without administrator approval. Requiring email verification may also be a deterrent to new customers, but you may decide that it's necessary for your particular site.
Handling canceled user accounts will also require some consideration. On the one hand, Drupal Commerce does guard against deleted users, to prevent breakage when historical orders reference users that no longer exist. So you can completely delete users if you want. On the other hand, there may be legal or financial implications with respect to retaining certain customer information.
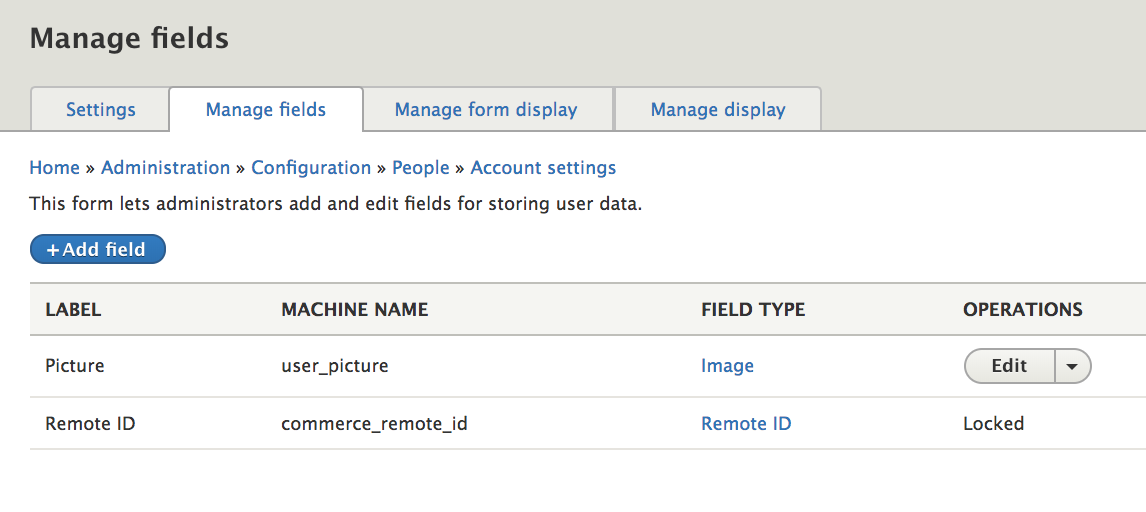
In addition to configuring Account settings, you may also want to add custom fields to your customer accounts. Use the Manage fields administrative page at /admin/config/people/accounts/fields to add custom fields. In a default Drupal installation, you will see a user Picture field and, if you have the Commerce Payment module enabled, you will also see a Remote ID field. If you won't use the Picture field, it's fine to delete it. The Remote ID field is locked and shouldn't be deleted, since it's necessary for Commerce Payment functionality.
Including profiles in user registration
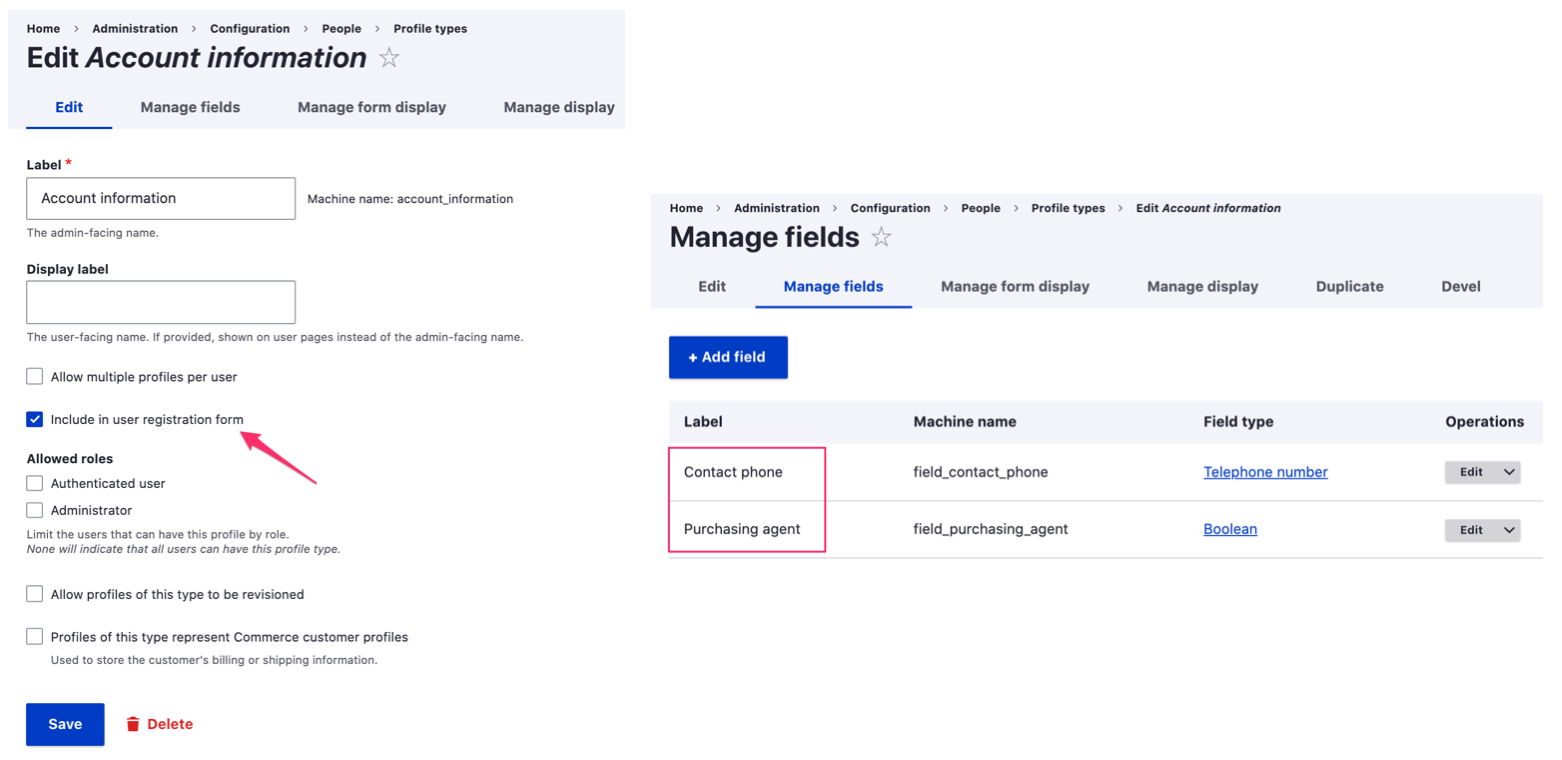
As described in the Profile management documentation, profile types have an "include in user registration form" setting. If enabled, a form for a profile of that type will be included in the user registration form. This option is useful if you want to collect information about customers right when they register.
For example, an "Account information" profile type has been created with "contact phone" and "purchasing agent" fields. It is configured for inclusion on the user registration form:
Example
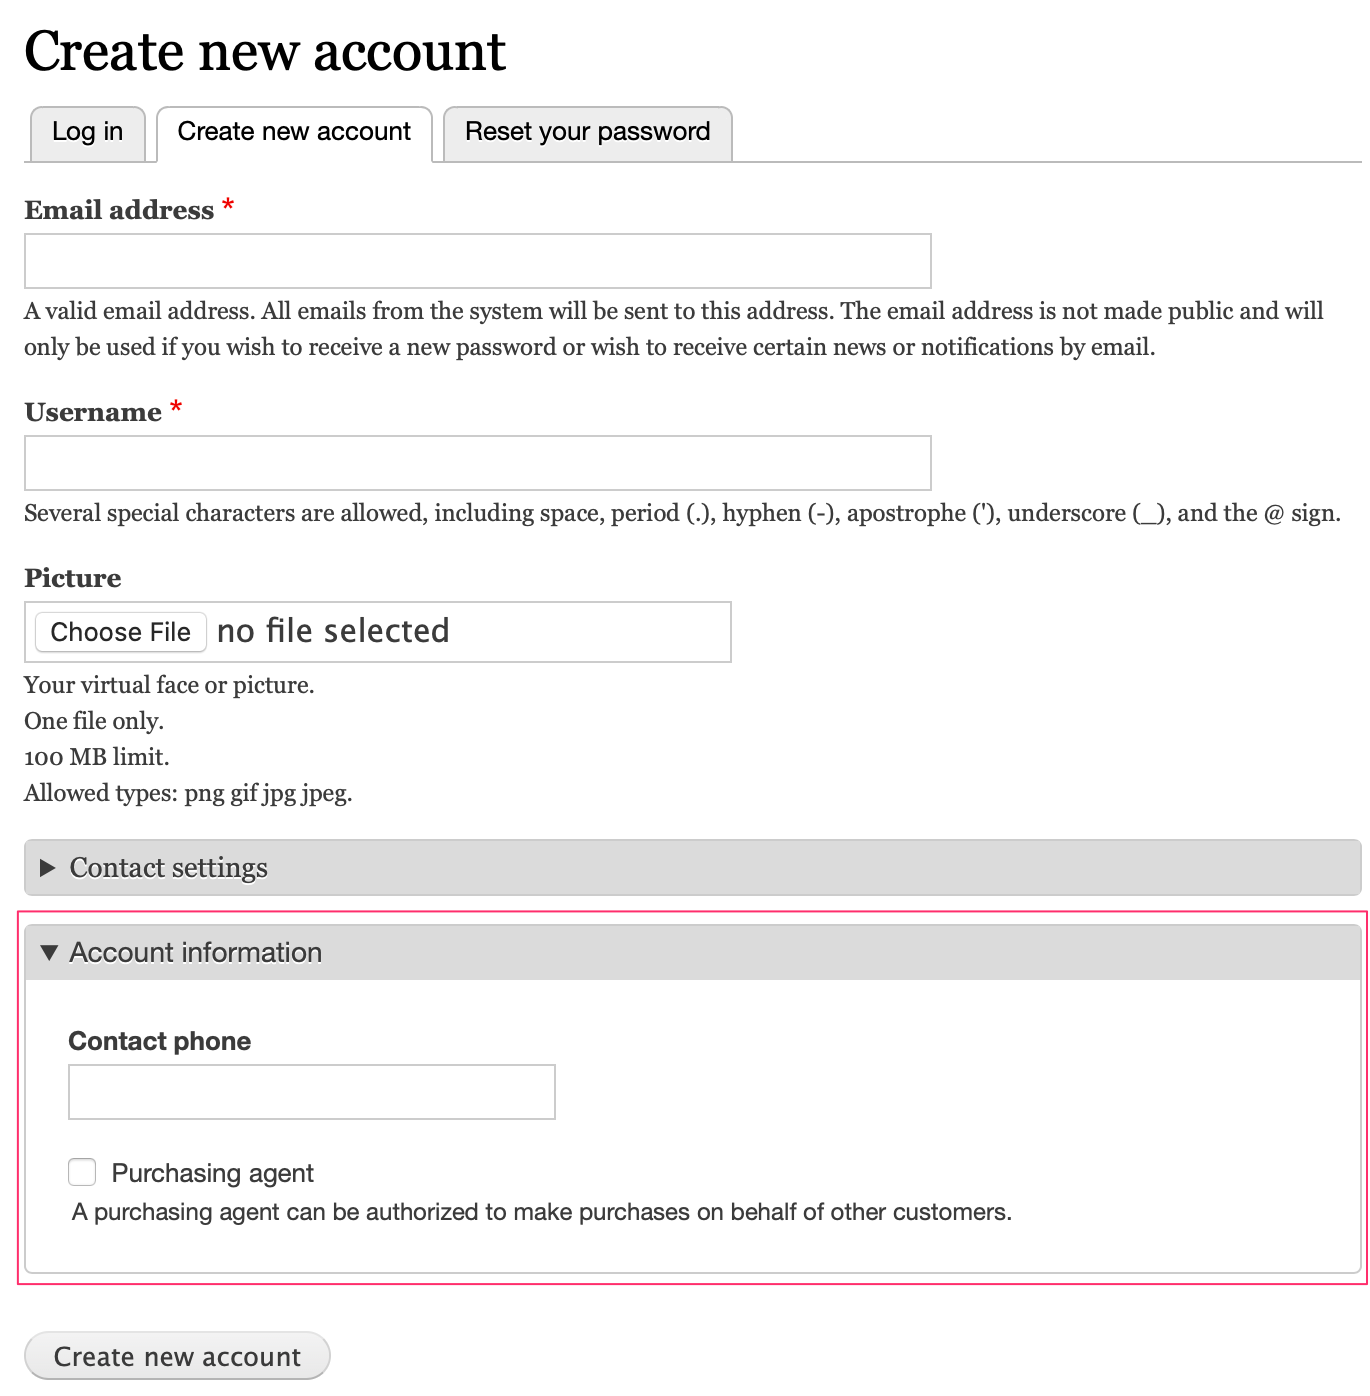
When a customer registers an account on the site, an "Account information" section appears on the registration form:
Managing customer accounts
The list of all user accounts, including both customers and administrative users is available on the People administrative page at /admin/people. You can customize this page by configuring its View settings at /admin/structure/views/view/user_admin_people.
There are many contributed Drupal modules that can help you manage customer accounts or provide additional functionality. See the User management modules listing. For example, Commerce sites often allow users to log in with their email addresses. By default, Drupal only allows login by username, but you can add this functionality with the simple Login Email or Username module or the slightly more complex Email Registration module.
Customer groups
In this section we'll look at two different approaches for organizing customers into groups. First, we'll look at how user roles can be used to limit access to discounts or other functionality within Drupal Commerce. Then, we'll look at how taxonomies can be used in situations where the number of different groups makes the user role approach impractical.
If neither user roles nor taxonomies provide enough functionality for your needs, there may be a contribued Drupal module that would work. See the User management modules listing.
Customer group user roles
You can use User roles to organize customers to limit access to payment gateways, promotions, or certain fees/charges based on customer type. Drupal Commerce provides plugin-based Conditions functionality and includes a condition for Customer role. As an example, let's suppose we have a select group of wholesale customers that should receive a 10% discount on all products. Here's how we could set that up:
Create a Wholesale customer user role.
- Navigate to the Roles administrative page at
/admin/people/roles. - Click the Add role button.
- Enter Wholesale customer from the name.
- Click the Save button.
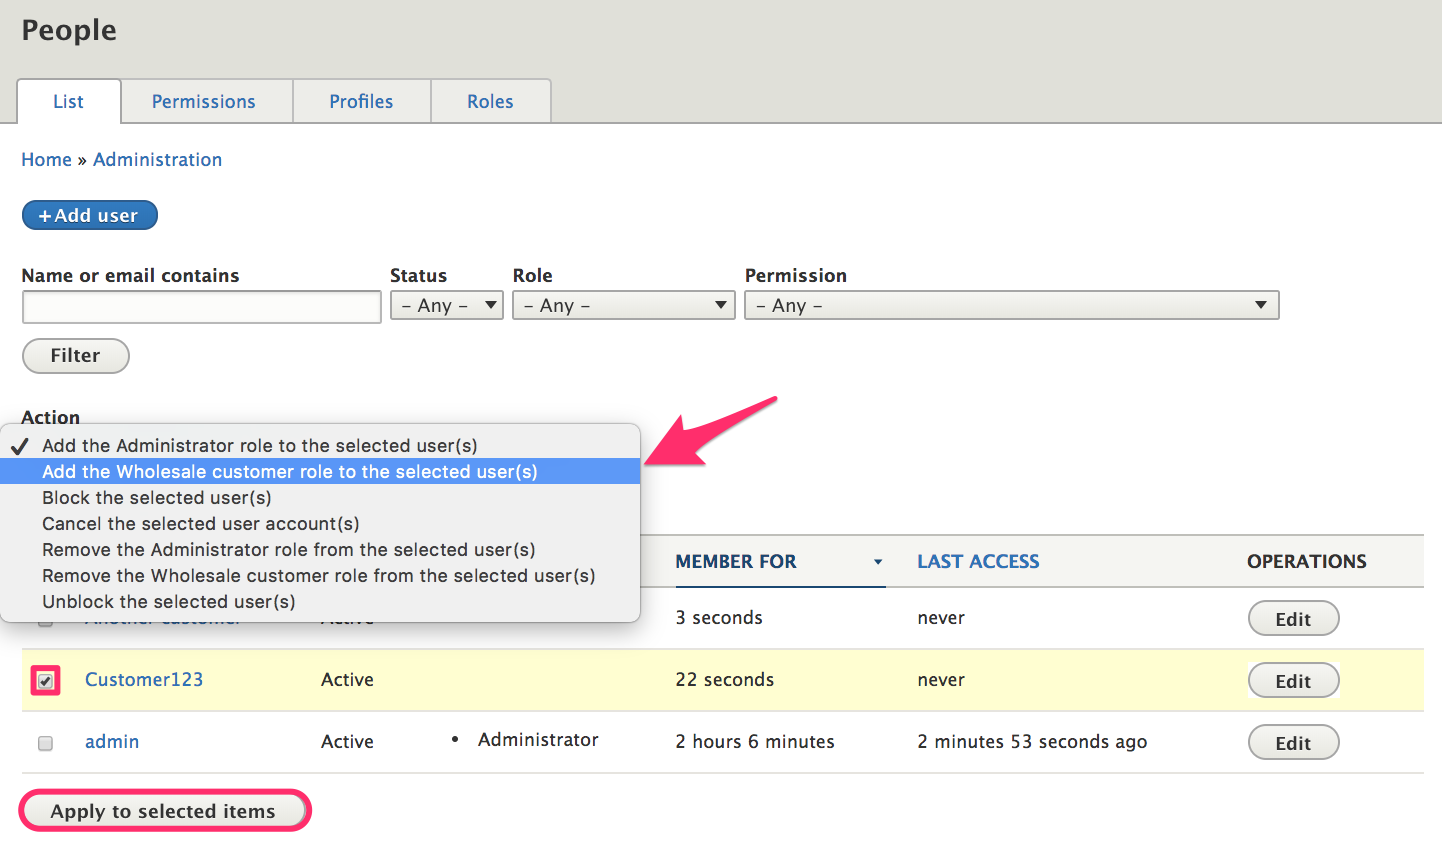
You will also need to assign this role to the appropriate customers by editing their Customer accounts at /admin/people. You can make bulk assignments by using the checkboxes to select customers and selecting the appropriate option under the Action menu:
Create a promotion for wholesale customers
5. Navigate to the Promotions administrative page at /admin/commerce/promotions.
6. Click the Add promotion button.
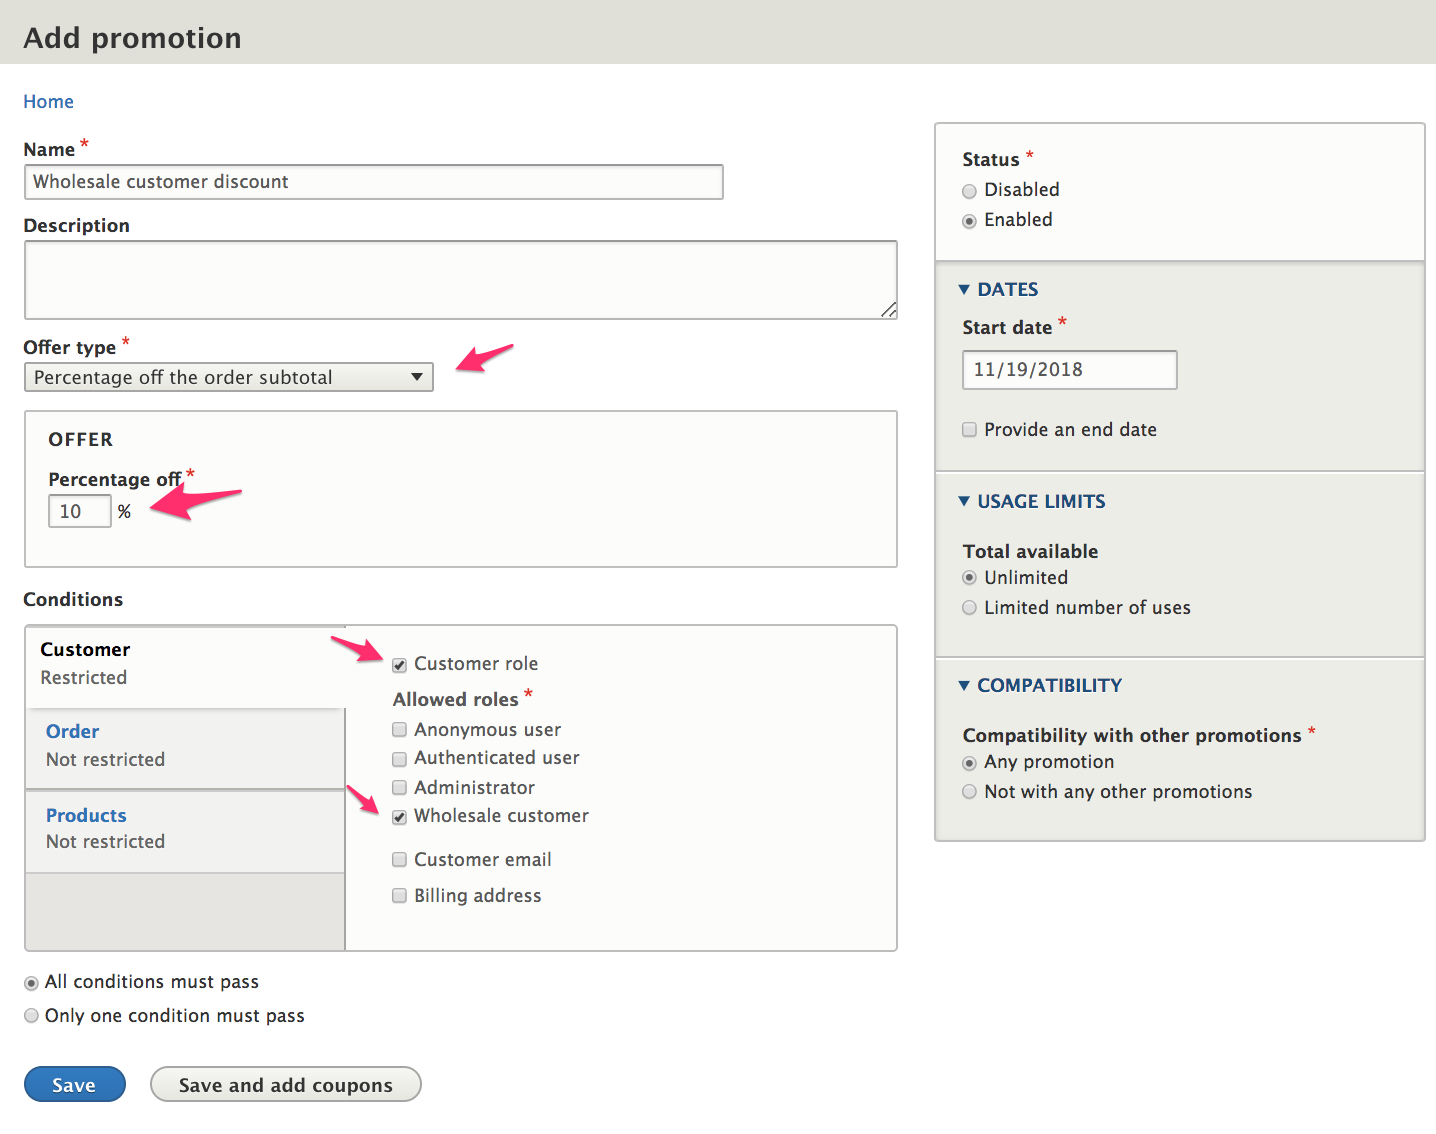
7. Enter Wholesale customer discount for the name.
8. Select Percentage off the order subtotal for the Offer type.
9. Enter 10 for the Percentage off value.
10. In the Conditions section, select Customer role as a Customer condition.
11. Select Wholesale customer for the Allowed roles.
12. Click the Save button.
Customer group taxonomies
If you have a high number of different customer groups, creating a user role for each might not be practical. For example, suppose you sell products to individual customers at universities. You might want to track sales based on university or provide discounts to specific universities. Creating a Universities taxonomy and populating it with the names of all your university customers is a good way to handle this.
Create a Universities taxonomy to group customers
- Navigate to the Taxonomy page at
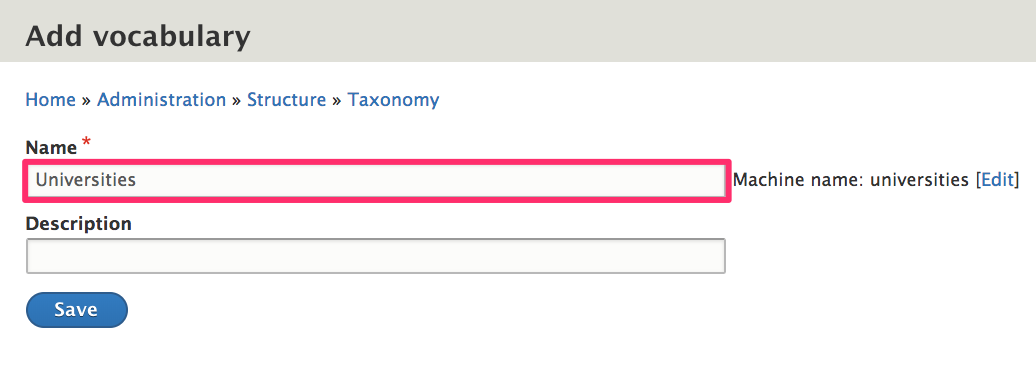
/admin/structure/taxonomy. - Click the Add vocabulary button.
- Enter "Universities" for the Name.
- Click Save to create the new vocabulary.
Now you can add terms to the vocabulary or look into using the Feeds module or Migrate Tools module to import your pre-existing data.
Add a University field to customer accounts
- Navigate to the Manage fields administrative page for customer accounts at
/admin/config/people/accounts/fields. - Click the Add field button.
- Select Taxonomy term (in the Reference section) for the new field type.
- Enter University for the Label.
- Click the Save and continue button.
- Click the Save field settings on the next page to save the default configuration values.
- On the University settings for User administrative page, select Universities for the Vocabulary.
- Click the Save settings button.

This University field will now appear on user account edit forms, and customers will be able to enter their own universities. If you do not want customers to have access to this field, you can use the Field permissions contrib module to provide that functionality. Also, you might want to consider using Profiles to store the information instead of customer accounts, depending on what other information you might need to capture. The Profile management documentation page describes how the Field permissions module can be used to limit access to certain fields.
Once you've created your University field, it can be added to Order views and sales reports. If you need to create discounts based on a customer group taxonomy like our Universities example, you'll probably need to look for a contrib module or create custom code. A condition for customer groups based on taxonomies does not exist in Drupal Commerce core. If you decide to write custom code, take a look at the Product category condition that's provided by the Product module. Specifically, you can use the code in the OrderProductCategory plugin and the ProductCategoryTrait trait as a starting point.
Links and resources
- Drupal 8 User Guide documentation on Creating a Role
- Drupal 8 User Guide documentation on Concept: Taxonomy
- Field permissions module